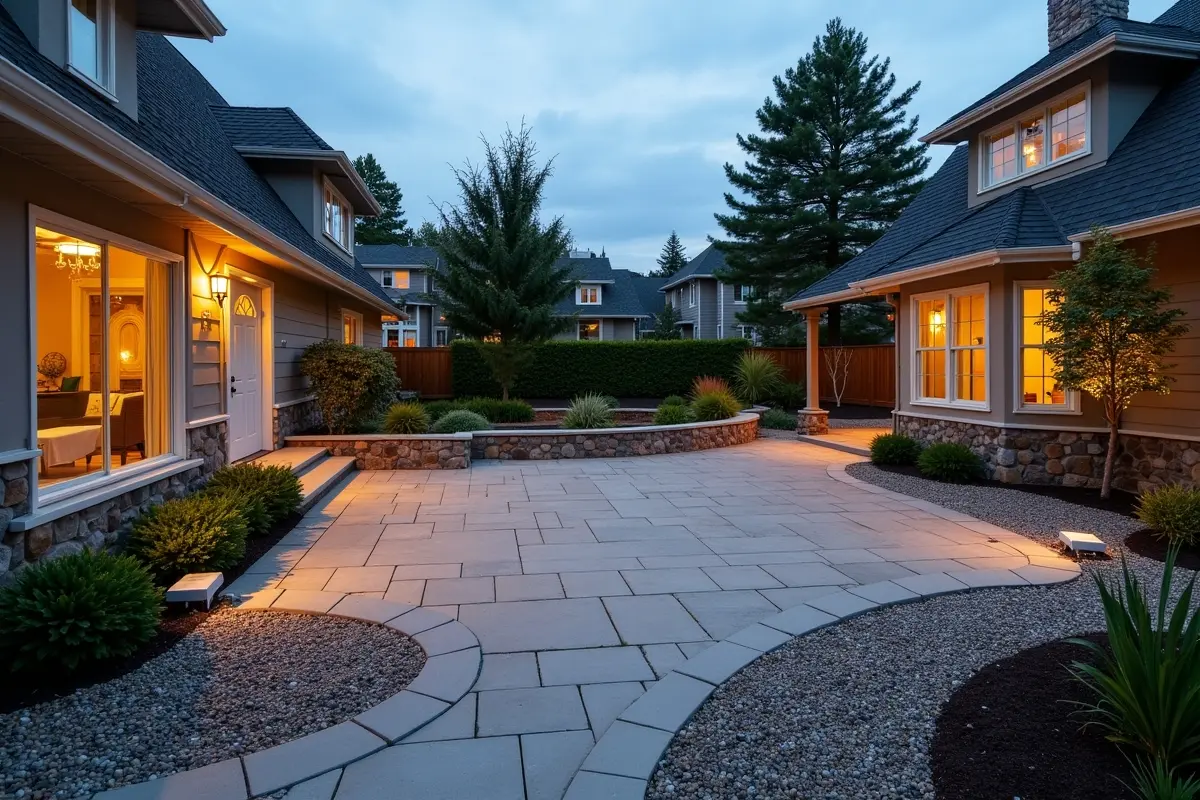
A low-maintenance backyard is not a backyard that never needs attention. It is designed to reduce unnecessary mowing, weeding, cleaning, and repair work while still providing people with useful places to gather, cook, relax, and move around. Thoughtful hardscaping can create that balance by turning frequently used parts of the yard into durable, organized outdoor rooms.
The best results begin long before materials are selected. A patio, path, retaining edge, or gravel sitting area should fit the property’s slope, drainage patterns, sunlight, and day-to-day routines. When those practical details lead the design, the finished yard is more likely to look intentional and remain easy to use through changing seasons.
Why Low-Maintenance Hardscaping Starts With Good Planning
Low maintenance comes from reducing friction. Direct paths prevent worn shortcuts through grass. Well-defined bed edges make trimming simpler. Properly sized gathering areas keep furniture from crowding walkways, and a limited material palette creates a calmer appearance than several competing finishes.
Outdoor spaces are increasingly planned for regular living rather than occasional use. A 2026 survey of outdoor renovations found that seating areas, dining spaces, gardening zones, and cooking areas are common priorities. That makes functional layout more important than simply adding features that look appealing in a photograph.
Step 1: Plan Around How the Yard Will Be Used
Start with activities, not colors. Mark where people will eat, sit, grill, garden, play, store supplies, and let pets outside. If the plan includes water as part of the outdoor layout, pool installation should be considered alongside circulation space, drainage, seating, and safe walking routes rather than treated as an isolated feature.
Questions to Ask Before Designing
- Where will guests naturally gather?
- Which routes will receive the most foot traffic?
- Does the patio need room for a dining set, lounge furniture, or both?
- Will pets need a durable, easy-to-clean area?
- Could mobility needs, family size, or hobbies change over time?
Place everyday seating close to the house when easy access matters. Keep busy routes direct, especially between doors, gates, storage areas, and cooking spaces. Quiet reading or garden areas can sit farther from the main traffic flow.
Step 2: Study the Site Before Choosing Materials
The yard itself should guide the design. Walk it after a heavy rain and note puddles, erosion, downspout discharge, and places where water moves toward the home. Also observe sun and shade at different times of day, locate large tree roots, identify utility covers, and measure side-yard access for deliveries.
A simple scaled sketch can uncover expensive conflicts early. It may show that a proposed patio blocks a gate, that a shade structure will affect an existing tree, or that a path belongs on firmer ground. Include permanent features and likely furniture footprints, not just the new surface areas.
Step 3: Choose Hardscape Materials That Age Well
Every material has tradeoffs. Concrete works well for broad, continuous surfaces, though cracks and stains can become visible over time. Pavers allow individual sections to be reset or replaced, but joints need periodic inspection. Natural stone offers texture and variation, while thickness and finish affect cost, footing, and maintenance.
- Gravel can suit informal paths, drainage-friendly zones, and low-cost seating areas, but it can migrate under heavy traffic.
- Brick provides a traditional appearance and can be repaired in sections, although settling may require occasional resetting.
- Permeable surfaces may help manage runoff where site conditions and local requirements allow.
Choose finishes based on expected traffic, heat exposure, slip resistance, stain visibility, and winter conditions. It is also wise to keep a small supply of matching pavers, stone, or brick for future repairs.
Step 4: Solve Drainage and Grading Issues Early
Drainage is one of the least visible parts of a finished project, but it has a major effect on longevity. Water that remains beneath a patio can contribute to settling, while runoff directed against walls, steps, or foundations can cause more serious problems. Grade surfaces so water moves away from structures and does not become trapped at paved edges.
Depending on the site, useful tools may include swales, channel drains, permeable paving, or planted collection areas. The EPA explains that rain gardens collect runoff from roofs, driveways, and streets so it can soak into the ground, although their placement and soil conditions need careful evaluation. Keep drains and downspout outlets accessible for seasonal cleaning.
Step 5: Pair Hardscape With Easy-Care Plants
Hard surfaces need living elements to soften edges, provide shade, and make outdoor rooms feel connected to the landscape. Select plants that match the site’s sunlight, soil, and moisture conditions. Group plants with similar watering needs, allow for mature size, and avoid narrow planting strips that are difficult to reach with basic tools.
A few larger, well-placed plantings often require less work than many small beds scattered around the yard. Mulch or suitable ground cover can reduce exposed soil, discourage weeds, and make the overall layout feel more settled.
Step 6: Add Shade, Lighting, Storage, and Seating
Comfort features determine whether a backyard gets used regularly. Plan shade with trees, umbrellas, pergolas, or covered areas. Use low-glare lighting on steps, paths, and gathering spaces so people can move safely after dark without overwhelming the yard. Plan furniture dimensions before finalizing the patio size, and leave enough room to pull chairs out and walk around them.
Storage is equally practical. Locate it near the items it supports, such as cushions, garden tools, grilling supplies, or pool accessories. Consider electrical, water, and gas needs before construction, since retrofitting utilities often requires disturbing finished surfaces.
Step 7: Design for Simple Cleaning and Repairs
Small details can make routine care far easier. Use clear edges that are simple to sweep, avoid narrow gaps where leaves collect, and provide hose access near areas that need rinsing. Removable pavers or accessible covers can make future work less disruptive when irrigation, drainage, or utilities require attention.
At least once each season, inspect joints, steps, retaining edges, drains, and downspouts. Address shifting, loose materials, standing water, and clogged outlets promptly, before they become larger repair projects.
Common Planning Mistakes to Avoid
- Choosing a surface for appearance before considering traffic, heat, and footing.
- Ignoring drainage until after construction begins.
- Using too many colors, textures, and materials in one small yard.
- Making paths too narrow for comfortable movement and maintenance access.
- Covering too much of the lot with hard surface and leaving little room for shade or planting.
- Forgetting that plants will grow beyond their nursery size.
Final Thoughts
A polished, low-maintenance backyard depends on practical decisions made early. When the layout supports daily life, materials fit the conditions, water has a clear path away from structures, and plants are selected for the site, the result can remain useful and attractive with less weekend work.